Showing posts with label HTML. Show all posts

Adobe Photoshop website templates for free - colorifer.com

Friday, June 6, 2008

colorifer.com specializes in development of FREE and QUALITY Adobe Photoshop website templates. They create website templates in accordance with the standards, the rules of usability and Internet trends. 

colorifer

Templates are easy to customize. You just add your logos, text and graphics. Taking their style as a basis, you can create original, professional looking websites in short terms. The templates are given in Photoshop format. You can edit the templates in Adobe Photoshop as well as in any other programs reading PSD files. Our templates do not include html code. Working with website templates is a splendid opportunity to practise your web design skills. Website templates, are offered free-of-charge.

In this website you can view Latest Free Website Templates, Adobe Photoshop Tutorials and more over Wordpress themes which are customizable. In Resources page if you see there are awesome enough resources are present which are related to Adobe Photoshop, HTML Editors, Icons, Logotypes, Maps, Patterns, Site Submission, Stock Images, Text Generators, Web Hosting and Web Templates.

If you want to contact them for more information visit - contact us page

Continue reading »

All WordPress themes at one place - for free

Thursday, May 29, 2008

Just I had a plan to change the theme of one my web blog to a good one, just searching the same for all around and at last I had a glance on one of the web blog called wpzoom. This Web Blog is famous for collection of WordPress resources.

On this Web Blog, there was a post like "45+ Free Premium WordPress Themes with Magazine or Grid Layouts"

WordPress Themes

In the above post, the author by name "Pavel Ciorici" has collected maximum of 45+ WordPress themes, and this collection constitutes of Free Premium WordPress Themes and most of the themes have Magazine or Grid Layout. For each and every theme he has given two links like "Visit Info" that is to know more about the theme, and "Visit Demo" it directly takes you to the Demo page which depicts how the whole theme functions and the look and feel of the theme. 

Above is one of the screen shot of the WordPress theme which Pavel has displayed on his post.

Continue reading »

A Cool and useful collection of Web Developer and Web Designer Resources!

Wednesday, May 28, 2008

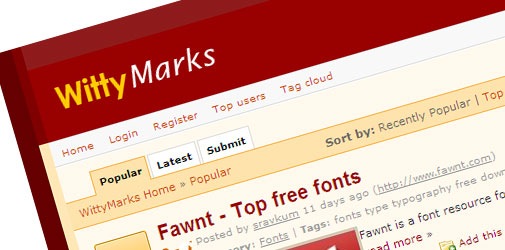
WittyMarks, a cool and really useful collection of web resources for designers and developers.

And the site was launched by the team of top blog WittySparks.com, as they want to keep this site clean and neat with fully functional and useful resources like wordpress themes, plugins, open source scripts, javascripts, css tips, menus, widgets, tutorials, php, earn money, etc.

wittymarks

And this site just bookmark the best resources available to just serve the fellow developers around. In this regards this site have the registration open to all but the submissions are disabled unless a particular user is really want to contribute the best resources than submitting their own blog posts to promote themselves, to be a part of the team and to contribute the useful resources you just need to participate in their site regularly by voting the posts which you think is more useful and comment.


As the site is recently launched they already have a cool resources to look into, so why not encourage their team to submit more useful resources.

Subscribe RSS Feeds:
Just keep yourself updated with new resources everyday, don't forget to subscribe for the same - RSS Feeds 

Continue reading »

Importance of !important in CSS

Monday, May 26, 2008

Do you know What does !important mean in CSS?, an "!important" declaration (the keywords "!" and "important" follow the declaration) this takes high precedence over a normal declaration. And can be framed in this way, this means that the styles are applied in order as they are read by the browser.

CSS it tries to create a balance of power between author and user style sheets. By default, rules in an author's style sheet override those in a user's style sheet. But in CSS1, this is in other way round - Author "!important" rules took precedence over User "!important" rules.


For Example:
User's Style Sheet:
   1: <style> 
   2:   p{font-size: 2em !important;} 
   3:   p{font-style: italic;} 
   4: </style>

Author's Style Sheet:
   1: <style> 
   2:   p{font-size: 3em;} 
   3:   p{font-style: normal;} 
   4: </style> 

If you see in the above instance, the first rule in the User's Style Sheet has "!important" declaration, which will overrides the first rule in the Author's Style Sheet. And if you observe for the second rule in User's Style Sheet it does not contain "!important" so this will be ruled out because here second rule in the Author's Style Sheet has got high preference so the HTML will render by taking size as "p{font-style: normal;}"

If you would like to know more on this, then check with the w3 site: w3.org and move to the section called "6.4.2 !important rules"


Continue reading »

Evolution of rounded corners from using Images to using CSS

Sunday, May 25, 2008

Earlier, if we want to create Rounded Corners in HTML we used to make use of Images to get that effect in HTML and now everything has changed a lot and we make use of pure CSS to render the html box in rounded corner style.

To create rounded corners in HTML, some of the developers still use images to get a box into rounded with the desired color or what ever. For that to render will take so much of time and if at all we miss one of the images the box will look messy.

For instance: Check out the below screen shot, if we want to create the rounded corner box. Below is the scenario (this is using Images)

Rounded Corners

We used to create four images for our corners. Most graphics programs have a tool that will create rounded-off squares. In the spot where you want the box to show up, just create a container div to hold the box, a div for the top row and a div for the bottom row. Between the top and bottom rows, you can add your valuable content to show up in the rounded corner box.

HTML Code:
   1: <div class="roundedcontainer">
   2:    <div class="roundedtop">
   3:      <img src="tl.gif" alt="" 
   4:      width="15" height="15" class="corner" 
   5:      style="display: none" />
   6:    </div>
   7:  
   8:    <p>Lorem ipsum dolor sit amet, consectetur adipisicing 
   9:    elit, sed do eiusmod tempor incididunt ut labore et 
  10:    dolore magna aliqua. Ut enim ad minim veniam, quis 
  11:    nostrud exercitation ullamco laboris nisi ut aliquip 
  12:    ex ea commodo consequat</p>
  13:
  14:    <div class="roundedbottom">
  15:      <img src="bl.gif" alt="" 
  16:      width="15" height="15" class="corner" 
  17:      style="display: none" />
  18:    </div>
  19: </div>

CSS Code:
   1: .roundedcontainer {
   2:     width: 250px;
   3:     background-color: #f90;
   4:     color: #fff;
   5: }
   6: .roundedcontainer p {
   7:     margin: 0 10px;
   8: }
   9: .roundedtop { 
  10:     background: url(tr.gif) no-repeat top right; 
  11: }
  12: .roundedbottom {
  13:     background: url(br.gif) no-repeat top right; 
  14: }
  15: img.corner {
  16:    width: 15px;
  17:    height: 15px;
  18:    border: none;
  19:    display: block !important;
  20: }

I agree this works fine in IE6, Mozilla 1.3, and Opera 7 on Windows. But to render those images might take some time and what will happen if we forgot the image to include or upload, the box looks messy right? Yes!

In these scenarios, you can make use of pure CSS to get that rounded curve with out images. And in no time the box will render perfectly with Rounded Corner, Would you like to know how? “Nifty Corners” has made it possible, below is the code for rendering the HTML box into rounded corners style by using only CSS styles. Isn’t it awesome YEAH! Thanks to Nifty Corners, in helping us in all the way!

Content courtesy “Nifty Corners”:

HTML Code:
   1: <div id="container">
   2: <b class="rtop">
   3:   <b class="r1"></b> <b class="r2"></b> <b class="r3"></b> <b class="r4"></b>
   4: </b>
   5: <!--content goes here -->
   6: <b class="rbottom">
   7:   <b class="r4"></b> <b class="r3"></b> <b class="r2"></b> <b class="r1"></b>
   8: </b>
   9: </div>

CSS Code:
   1: .rtop, .rbottom{display:block}
   2: .rtop *, .rbottom *{display: block; height: 1px; overflow: hidden}
   3: .r1{margin: 0 5px}
   4: .r2{margin: 0 3px}
   5: .r3{margin: 0 2px}
   6: .r4{margin: 0 1px; height: 2px}

If you want to see the example, how it renders – click here

Continue reading »